5 Simple Steps to Create a Website
 |
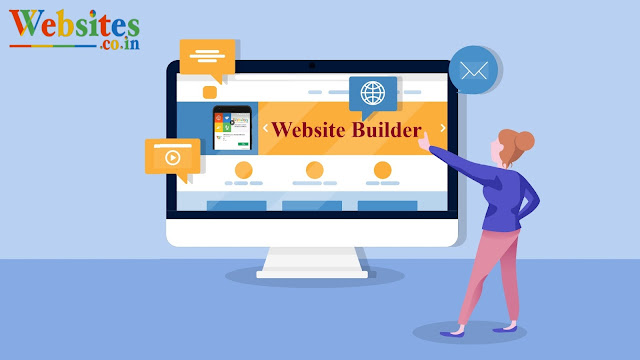
| Website Builder |
Creating a website is so easy these days that even a beginner could build a website in minutes. The most complicated thing you will need to do is remember the secret password for your website builder account.
The days of coding skills and setting up server's IP addresses are, fortunately, gone. Nowadays, creating a website utilizing a website builder is similar to making a Powerpoint presentation.
Modern website maker tools help you consistently. You'll have the option to utilize expertly made, savvy-looking website templates that assist you with creating a website. Also, there are loads of jargon-free assistance available if you are stuck.
On the off chance that you've been putting off creating a website since you believe it's excessively hard or too time-consuming. In this guide, we'll walk you through every one of the means enroute to making your site.
Stage 1: Choose The Best Website Builder
First of all: You can't build a website without a website builder. Website builder are software programs intended to make the way toward creating a website quick and simple. When utilizing one, you'll have the option to control the content and design of the website without contracting out to a costly web developer to hardcode the website.
Anyone can utilize a website builder. Mainly they are focused on complete beginners. You will not need design skills or coding skills only, you just need a laptop or smartphone with an internet connection.
There are a ton of best website builder available out there. Websites.co.in is one of the best, on account of its vast suite of useful templates, and Wix is a solid competitor as well, yet our most elevated scoring website builder is Websites.co.in.
We think Websites.co.in is extraordinary because it's unbelievably simple to utilize, has loads of help and support options. Its high endorsement rating from clients doesn't hurt, either. If you need to find out more about Best Website Builder, you can visit Websites.co.in.
Stage 2: Choose a website template
Pick the Type of Site
You will be requested to pick what your website is going to be for – will it have an online store, would you say you will run a blog, is it going to be for a restaurant or a business? There's additionally an "other" alternative that will take you straight through to the template editor.
You will be then presented, with a filtered list dependent on the selection you have just made. Some of the categories are filtered even further – assuming you pick "Restaurant & Food" the templates that are then filtered by what sort of business: Catering and Chef, Cafe and Bakery, etc.
Once you've picked your template – and don't stress, they're all pretty good – you can go straight into altering your site.
Stage 3: Editing Your Website
So now you've picked your template, you are on the actual website development part of the process. The template will be pre-loaded with stock words and images that you can slash and change however you would prefer.
Adding Images
Uploading a picture is, however, as simple as it could be while uploading one to Facebook or Twitter. If you don't have any to include, you're commonly loads of stock pictures to chose from as well.
Editing Text
Changing the content is, once more, pretty much straightforward – all you have to do is click on the bit of text you would prefer to change & you will have the option to type straight into the content box. You can likewise change the size and style of each bit of text, but it's worth remembering that every text style will generally be consistent with the template, so rolling out radical changes may make it look somewhat odd.
Drag and Drop
Websites.co.in like most other website maker, utilizes a grid-based, drag-and-drop framework for page editing. This implies that it will be clear to keep every element on your page in line and when you need to add another text box, image, or some other sort of element, you will have the option to see, initially, how to fit it into your page.
You are likewise ready to change the pages on your website, regardless of whether they scroll straight into each other, and a large group of other site-wide factors from the settings or pages menu, rather than with the grid-based editor. These can feel slightly confusing at first, but it attempts to keep the page-specific content separate from the general site navigation and usability.
 |
| Website Maker |
Additional Tools and Functions
You will likewise have the option to add elements beyond text boxes and images with Websites.co.in and other website builders. These might include, for instance, restaurant menus, contact forms, or social media feeds.
Once more, you will have the option to drop these onto the page and line them up utilizing the gridlines. You might find that some applications and functionality are reserved for paid plans but typically, this is for eCommerce functions like stock tracking and shipping costs.
Stage 4: Create a Domain
At this point, when we talk about a website's domain, we are essentially discussing the website's address. For instance, Websites.co.in is the name of our site, and the domain name is https://websites.co.in
You'll regularly need your website's domain to relate with the name of your business, blog, or whatever reason for existing you're running it for – to make sure you don't confuse individuals. Try writing up a list of potential outcomes and pick the best.
Most website builders will give you a free domain, to begin with – but they will often have the name of the website builder shoehorned in. For example: My creatively named website Digital Marketing, Freelancing would have the domain https://digitalmarketing.websites.co.in/freelancing.
To eliminate this stuff from your domain name – that's right, you guessed – you'll need to pay. Luckily, with the most website builder, including Websites.co.in, this comes as a feature of the cheapest plan.
Should you already be the proud owner of a domain, you will be satisfied to realize that you can connect a pre-existing domain to the website builder. You'll discover the option to do this on the website's settings page.
Stage 5: Publish Your Website!
That is it, by all your content loaded up and the design perfected, a registered domain, and having signed up for the perfect payment plan - you are ready to publish the website.
Before you do, however, it's most likely worth getting somebody you trust to take a look over the website – an errant spelling mistake may be the difference between a sale, a booking, or a commission!
The fun isn't over, however. You will have the option to – and you should – go in and update your website on the off chance that anything changes, or you simply fancy changing some of the content. That will keep your website looking and feeling fresh for any individual who visits.
Subsequent stages in Creating Your Website
On the off chance that you follow these five stages, creating a website is unimaginably clear — particularly with an extraordinary website builder like Websites.co.in.
Regardless of whether you need a blog, business website, or an online store, the simple, drag-and-drop editing tools and attractive pricing packages make it the perfect spot to start.


Comments
Post a Comment